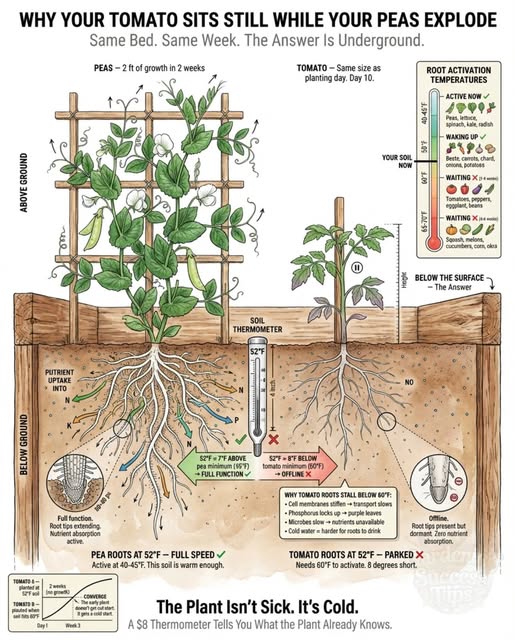
Your peas are climbing two feet in a week. Your tomato transplant hasn’t moved since you planted it ten days ago. Same bed. Same soil. Same water.
The tomato isn’t sick. It’s cold.
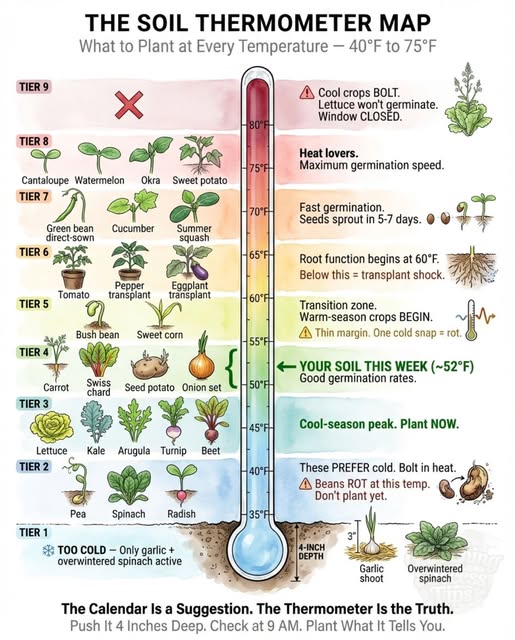
Push a soil thermometer four inches deep. If it reads below sixty degrees, that number explains everything.
Pea roots activate in the low forties. At fifty-two degrees they’re running at full capacity — which is why the pea is sprinting while the tomato sits still. Tomato roots don’t come online until the soil hits sixty. Below that, they’re alive but functionally parked. Root tips aren’t extending. Nutrients aren’t moving. The plant can’t take up phosphorus or transport calcium properly in cold soil.
That purple tint on early-season tomato leaves isn’t a deficiency you need to fix with fertilizer. It’s cold soil locking phosphorus into forms the roots can’t absorb yet. The fix is warmth, not a bag.
The practical version:
– If soil is below sixty — leave tomatoes, peppers, and eggplant in their pots on the porch. They’re not gaining anything in cold ground
– A tomato planted two weeks later into sixty-degree soil will match and overtake one planted into fifty-two-degree soil within days
– The early plant doesn’t get a head start. It gets a cold start
– The peas, lettuce, spinach, and radish are fine right now — their roots were built for this temperature
The thermometer tells you what the plant already knows.